Introduction
Hay is the backbone of winter feed for cattle, sheep, and horses. Making your own hay lets you control quality and save money compared to buying it. In this guide, we’ll walk through each step – from mowing to baling and storage – and explain which equipment works best for different farm sizes.
Mowing
The first step in making hay is, naturally, cutting the grass. You need to cut the pasture grass quickly and neatly to lay the foundation for even drying later. To maximize nutritional value, different types of pasture grass should be harvested at different growth stages. Most grasses are best harvested before they start blooming, because that’s when their nutritional value is highest. However, there are a few exceptions, like clover and alfalfa, which should be harvested in the early stages after they flower to get more nutritious hay. It’s also important to consider the cutting height to avoid damaging the grass’s ability to grow back.
Mowing Machine
The traditional scythe mowing relies entirely on manual labor and is unsuitable for large-scale mowing. You can use a lawnmower for mechanized harvesting. If the area you need to mow is small, a walk-behind lawnmower will suffice. Large pastures generally use rotary mowers, reciprocating mowers, or disc mowers.
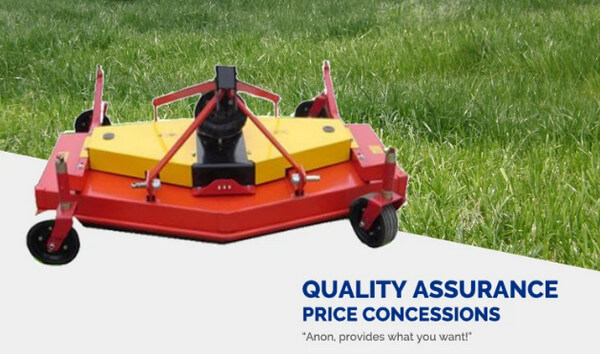
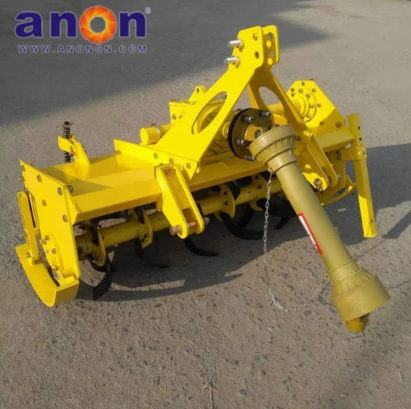
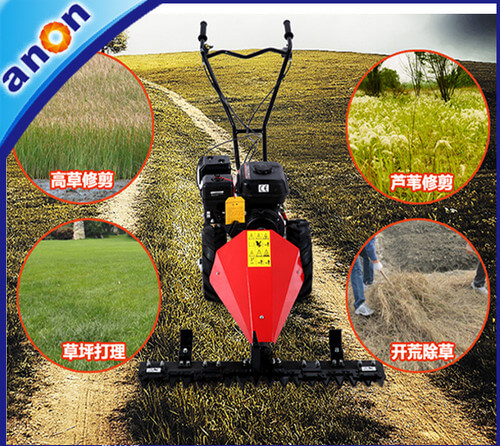
A rotary mower cuts grass with high-speed rotating blades and is suitable for most types of grass. Its main working part is the rotating cutting blade. Our backpack mower is a simple rotary mower that can be used to harvest grass, rice, wheat, and other crops.
Reciprocating mowers cut grass through the relative shearing motion of fixed and moving blades, resulting in a clean cut and requiring less power per unit of cutting width. Some reciprocating mowers can also combine mowing and raking with the addition of raking tines. However, reciprocating mowers are less adaptable to different growth stages of grass and are prone to clogging, making them mainly suitable for flat natural grasslands.
For large pastures with dense grass, you will need to use a disc mower to complete the job. Like rotary mowers, disc mowers also use rotary cutting, but they utilize rotating discs for faster mowing. The number of discs determines the cutting width.
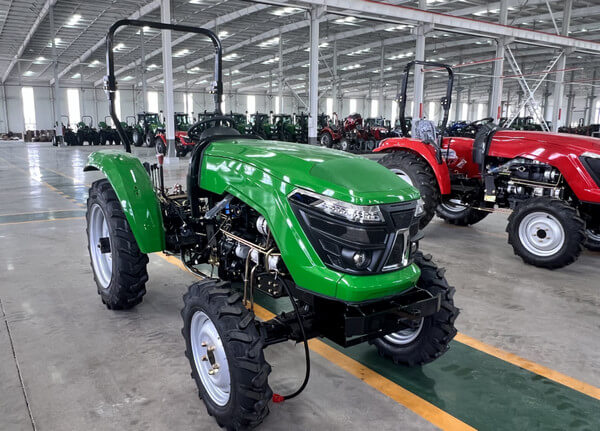
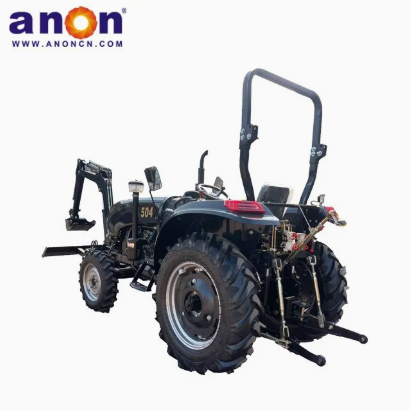
Most of these mowers require a tractor to operate, so when purchasing, many of the machines we will be discussing next will utilize tractors, which are indispensable both as a pulling tool and for power output. Be sure to choose one that matches your tractor’s horsepower for convenient use.
Tedding
As the saying goes, “Make hay while the sun shines,” and the drying process is crucial in haymaking. It reduces the moisture content of the forage from 70%-80% to 15%-20% quickly. After cutting the grass, you need to spread the cut grass into wide, loose swaths to maximize exposure to sunlight and ventilation.
Tedding Machine
During the raking and turning stage, you will use a tedder, which helps you spread and turn the hay. Turning the hay helps it dry faster, keeps it fluffy, and prevents mold and rot, which is key to improving drying efficiency. Of course, if your pasture is small, a hay fork is also an economical option. If your pasture has a high yield, it is highly recommended to purchase a tedder. It uses rotational motion, and the rotating tines grab the hay and throw it to the back of the machine. A tedder is a powerful tool for spreading thick hay for drying after rain.
If you have a wheel rake or a rotary rake, you can also use them as alternatives. Although these are rakes, you can also use them to turn over hay. By adjusting the lifting angle of the spring tines on the wheel rake, you can turn the hay. Similarly, by changing the rotation direction of the raking disc on the rotary rake, you can spread the hay.
Raking
Hay usually takes 3 to 5 days to dry, but the exact time depends on the weather and the quality of the hay. Generally, when the surface of the hay turns yellow, it indicates that it is dry. After drying, you should use a hay rake to turn the hay over and rake it into loose windrows to prevent it from being blown away by the wind, while also further promoting drying and facilitating subsequent baling.
Raking Machine
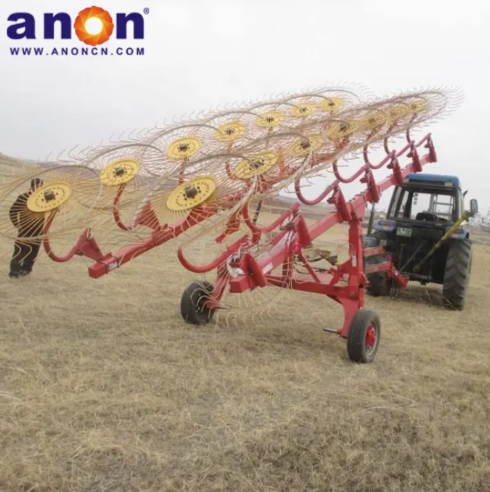
You will use a hay rake in this step. If you want a machine that can both rake and spread hay, you can choose the wheel rake or rotary rake I mentioned earlier.
Wheel rakes have a simple structure and work through parallel wheels mounted on the machine’s axle. They are driven by friction from the ground wheels and require no power. They can form long, straight, and fluffy windrows of hay. If your pasture is relatively flat and has high yields, this is a good option. In addition, wheel rakes can also help remove unwanted plastic film from the soil.
Rotary rakes can be divided into two types: tine rakes and spring-tine rakes. Tine rakes are driven by a power take-off shaft, while spring-tine rakes utilize centrifugal force generated by rotation. Rotary rakes collect hay in a loose, airy manner, achieving even and clean raking with minimal contamination. The raking width and the width of the hay rows can be adjusted according to your needs.
In addition, we also offer bar hay rakes and lateral rakes. If your forage yield is high, you can use a bar hay rake. Its main component is a basket with six or seven rods that rotate around a horizontal axis. It continuously collects hay to one side of the drum. The collected hay is of high quality, fluffy and neat, with minimal loss. Remember that the size of the hay pile depends on your forage yield.
Lateral rakes collect hay in rows perpendicular to the direction of machine movement. This type of rake is available in both towed and mounted versions. The working part consists of a row of lateral, parallel, arc-shaped tines. During operation, the tips of the tines contact the ground, and the raking is completed by tractor traction. Although its working speed is slower, you can control the size of the hay pile, making it suitable for low-yield pastures.
Baling
Once the forage grass has dried to a safe moisture level, you need to collect and store it quickly to prevent it from getting wet again. This is where a baler comes in handy. Baling is crucial in the haymaking process, and a baler is indispensable. A baler effectively compresses the hay, making it easier to handle. Neatly and tightly baled hay saves storage space. Furthermore, baling the hay when its moisture content is optimal helps preserve its nutritional value as much as possible.
Baling Machine
No single baler can meet the needs of all farms, so you need to understand the different types of balers and your specific requirements to choose the machine that’s best for you.
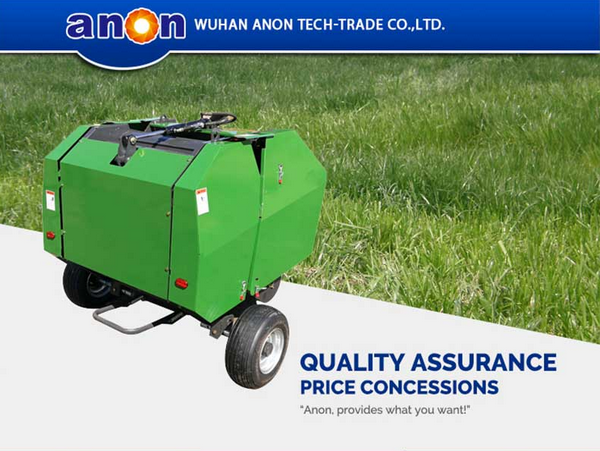
The most common type is the round baler, which packages processed hay into round bales. The type of hay affects the density and size of the bales. Round balers automatically pick up the hay and feed it into the machine, where rotating rollers roll the hay into a core until a round bale is formed. Round bales have a smooth surface and better water resistance, making them more durable in harsh weather.
Square balers process hay into square bales. The hay is picked up and fed into a compression chamber, where it is gradually compacted. When the bale reaches a preset length, it is automatically tied and ejected from the machine. Square balers also feature density controllers, allowing you to adjust the bale density based on the type of hay and moisture content. Square bales are generally easier to stack and transport.
If your pasture is small, has uneven terrain, or you have limited storage space, you can opt for a mini round baler or a mini square baler. These compact balers are smaller versions of traditional balers, with narrower pickup widths and smaller bales, making them easier to handle and store.
Storing
It’s also important to learn how to properly store hay; otherwise, all your hard work could go to waste, and it could even lead to animal illnesses.
When stacking hay, don’t let the bales touch the ground directly, and pay attention to the stacking height. Stacking too high can cause the hay to mold and overheat. Also, make sure to leave ventilation channels in the storage area to reduce humidity and prevent mold.
If you must store hay outdoors, it’s best to place pallets under the hay bales to prevent moisture buildup. During rain, cover the hay with plastic or other protective material. After the weather clears, it’s best to dry the hay again. When storing round hay bales outdoors, try to choose a location that is elevated and has good drainage.
Matters Needing Attention
Pay Attention to the Weather
Haymaking relies on favorable weather conditions, so be sure to check the weather forecast and choose a period of 3-5 consecutive sunny days for the process. Rain will severely reduce the quality of the hay.
Control the Moisture Content
Controlling the moisture content of the hay is also crucial. If the moisture content is too high (>25%), baling and storage will easily lead to mold and spoilage. If the moisture content is too low (<12%), the leaves will become brittle, resulting in significant nutrient loss. A simple way to judge is to take a handful of hay and twist it firmly. The ideal moisture content is when you feel a cool sensation and hear a slight rustling sound, but the hay does not break easily.
Conclusion
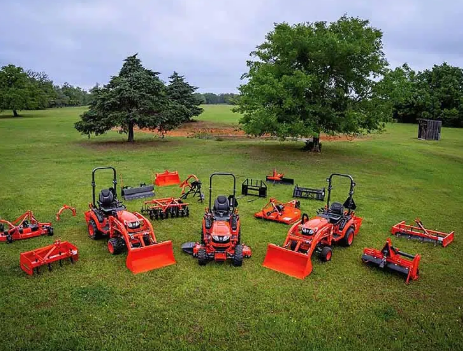
For families or small farms, the process can start with a lawnmower, hayfork, and manual baling. For large-scale production covering tens of acres or more, a combination of mowers, tedders, rakes, and balers is a necessary investment to ensure efficiency and quality.
After reading the detailed guide above, you should now understand how to make hay and which machines are needed at each stage. If you have any questions, feel free to contact us at ANON. As leaders in agricultural machinery, we offer the most professional advice and the highest quality machines.
FAQ
How to choose the right baler?
Besides considering the size of your farm, you also need to choose based on the type of hay you have. For example, tougher hay needs a baler with stronger compression. Additionally, if your hay will be transported long distances or stored in a warehouse, square bales are a better choice.
Is it cheaper to buy hay or grow your own?
If you have limited land for growing hay, buying hay might be more cost-effective, allowing you to utilize your land more efficiently for grazing. If you have a larger area of land, you can spread the costs over a larger area.
What if it rains during the drying process?
If it’s light rain, immediately use a rake to gather scattered hay into small piles and cover them with a waterproof cloth to prevent rain. After the rain stops, spread out the hay again to dry, to avoid prolonged moisture that may cause the hay to rot.
If it is heavy rain, semi-dry hay should be piled up into small piles, covered with waterproof cloth at the top of the pile, and wooden boards should be placed at the bottom to prevent the hay from coming into contact with the ground and absorbing moisture. After the rain stops, choose a sunny day to spread out the hay again and extend the drying time as needed. Rainy hay is prone to yellowing and loss of nutrients. If the hay is severely moldy, it should be discarded immediately and not fed to livestock.
Can I use a regular lawnmower to mow the grass?
The results are not good. Regular lawnmowers cut grass too short, resulting in uneven strips, and they are not suitable for drying in the field. Rotary, disc, or sickle mowers are best for mowing. For very small plots (less than 0.5 acres), a push brush cutter can be used, but the quality of the hay produced will be poor.
What is the profit per acre of hay?
The profit of hay per acre fluctuates greatly, with a potential profit of about $50 to $200 or more per acre in a bountiful year, but it may also be close to break even or even result in losses. Profit depends on many factors, including yield, hay prices (which vary depending on location and quality), and production costs, which are in turn influenced by expenses such as fertilizers and labor.